In robotics and automation, a control loop is a non-terminating loop that regulates the state of a system. Here is one example of a control loop: a thermostat in a room. When you set the temperature, that’s telling the thermostat about your desired state. The actual room temperature is the current state. The thermostat acts to bring the current state closer to the desired state, by turning equipment on or off.
Each controller tries to move the current cluster state closer to the desired state.
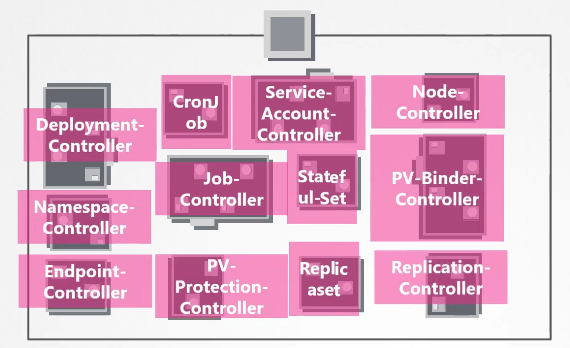
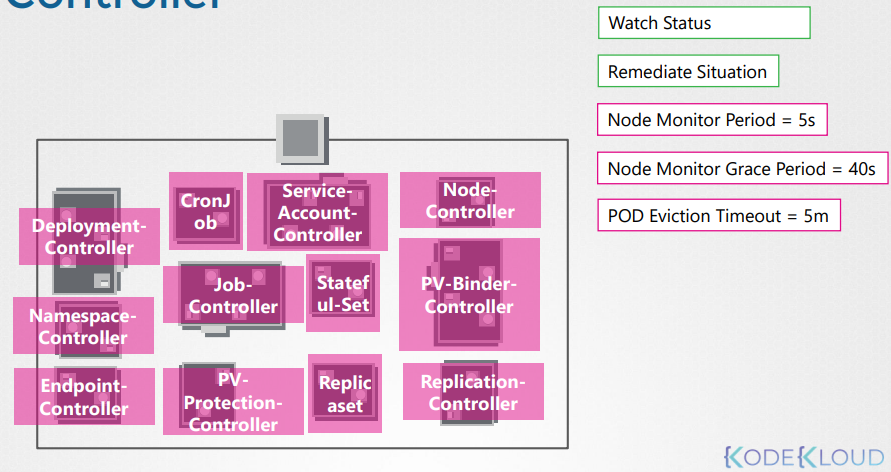
Kubernetes comes with a set of built-in controllers that run inside the kube-controller-manager. These built-in controllers provide important core behaviors.
The Deployment controller and Job controller are examples of controllers that come as part of Kubernetes itself (“built-in” controllers).
Kubernetes lets you run a resilient control plane, so that if any of the built-in controllers were to fail, another part of the control plane will take over the work.
You can find controllers that run outside the control plane, to extend Kubernetes. Or, if you want, you can write a new controller yourself.
You can run your own controller as a set of Pods, or externally to Kubernetes. What fits best will depend on what that particular controller does.
Kube Controller Manager
Kube Controller Manager manages various controllers in Kubernetes. In Kubernetes terms, a controller is a process that continuously monitors the state of the components within the system and works towards bringing the whole system to the desired functioning state.
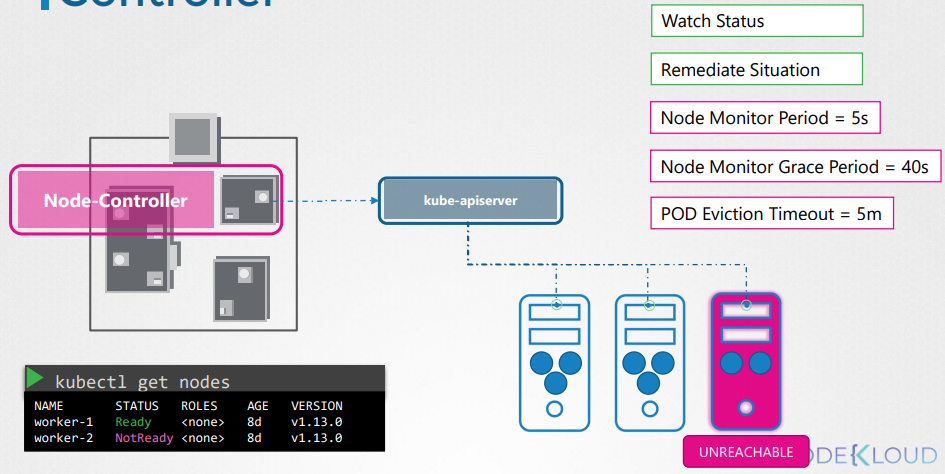
Node controller
Responsible for monitoring the state of the Nodes and taking necessary actions to keep the application running.
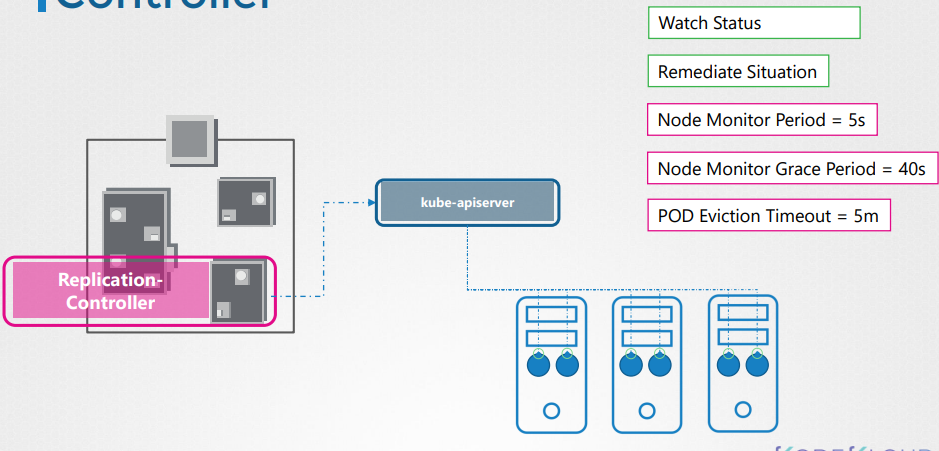
Replication controller
It is responsible for monitoring the status of replica sets and ensuring that the desired number of pods are available at all time within the set.
Replica set is a new recommended way to replace replication controller.
apiVersion: v1
kind: ReplicationController
metadata: #Replication controller metadata
  name: myapp-rc
  labels:
    app: myapp
    type: front-end
spec:
  template:
    metadata: #Pod metadata
      name: myapp-pod
      labels:
        app: myapp
        type: front-end
    spec:
      containers:
        - name: nginx-container
          image: nginx
  replicas: 3
To Create the replication controller
$ kubectl create -f rc-definition.yamlTo list all the replication controllers
$ kubectl get replicationcontrollerTo list pods that are launch by the replication controller
$ kubectl get pods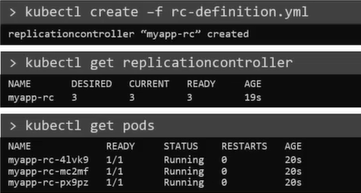
Purpose:
Replication controller job is to help us achieve high availability. Replication controller could span over multiple nodes

ReplicaSet
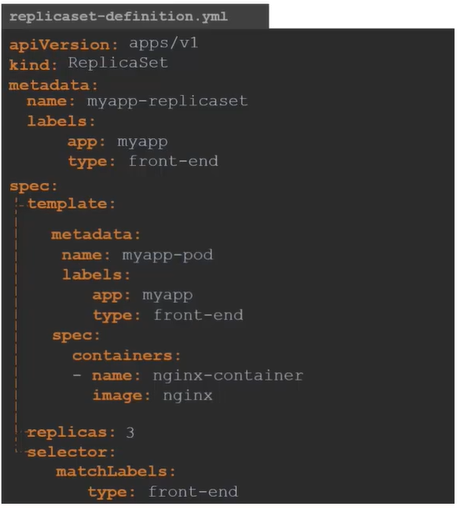
apiVersion: apps/v1
kind: ReplicaSet
metadata:
name: myapp-replicaset
labels:
app: myapp
type: front-end
spec:
template:
metadata:
name: myapp-pod
labels:
app: myapp
type: front-end
spec:
containers:
- name: nginx-container
image: nginx
replicas: 3
selector:
matchLabels:
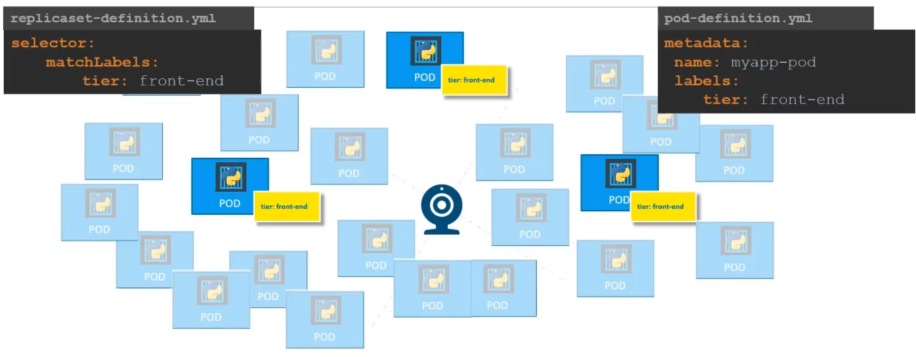
type: front-endReplicaSet requires a selector definition when compare to Replication Controller. The selector definition will help the replication set controller to identify which pods will fall under it.
But why would we need the selector when we have provided the pod template to the controller?
It’s because the replicaSet is capable of managing and looking after pods that was not assigned to it at the time of creation of replication set
To Create the replicaset
$ kubectl create -f replicaset-definition.yamlTo list all the replicaset
$ kubectl get replicasetTo list pods that are launch by the replicaset
$ kubectl get pods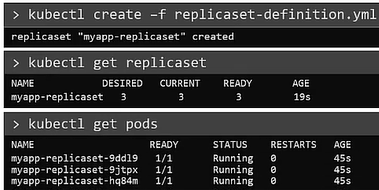
Scale replica set
There are multiple ways to scale replicaset.
-
To update the number of replicas in the replicaset-definition.yaml definition file. example: replicas: 6 and then run.
-
To use
kubectl scalecommand.- with
-fflag - without
-fflag and giving number of replicas
- with
apiVersion: apps/v1
kind: ReplicaSet
metadata:
  name: myapp-replicaset
  labels:
    app: myapp
    type: front-end
spec:
template:
  metadata:
    name: myapp-pod
    labels:
      app: myapp
      type: front-end
  spec:
    containers:
      - name: nginx-container
        image: nginx
replicas: 6
selector:
  matchLabels:
    type: front-end
$ kubectl apply -f replicaset-definition.yamlSecond way is to use kubectl scale command with -f flag to edit the file.
$ kubectl scale --replicas=6 -f replicaset-definition.yamlThird way is to use kubectl scale command with type and name
$ kubectl scale --replicas=6 replicaset myapp-replicaset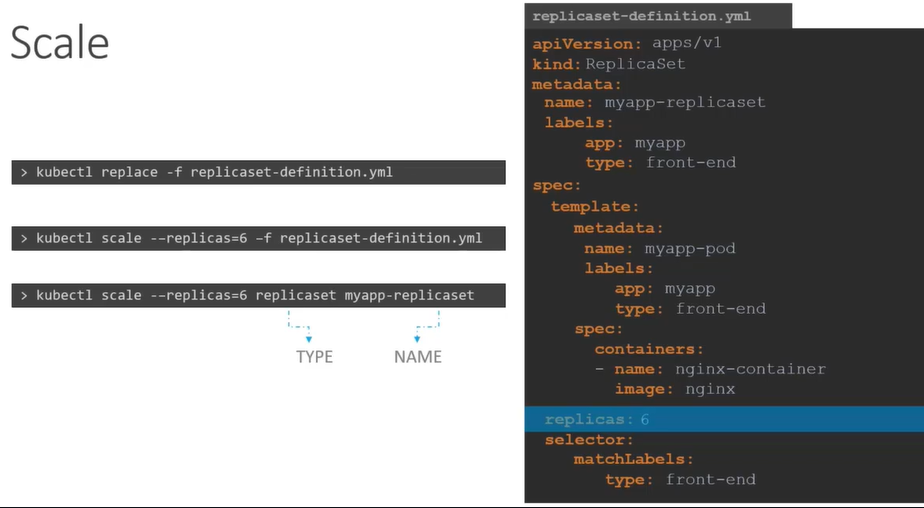
- Change the file
replicasfrom 3 to 6 and replace the filekubectl replace -f <filename>.yaml
- Edit existing replica set name
kubectl edit replicaset <new-replica-set>
- scale command
$ kubectl scale --replicas=5 replicaset new-replica-set
Replication controller vs replica set
Replica set requires selector. The reson it requires selector is because it can look after the pods that was created before the replication controller.
Other controllers
There are many more such controllers available within Kubernetes
Installing Kube-Controller-Manager
When you install kube-controller-manager the different controllers will get installed as well. Download the kube-controller-manager binary from the Kubernetes release page. For example: You can download kube-controller-manager v1.13.0 here kube-controller-manager
$ wget https://storage.googleapis.com/Kubernetes-release/release/v1.13.0/bin/linux/amd64/kube-controller-managerBy default all controllers are enabled, but you can choose to enable specific one from kube-controller-manager.service
$ cat /etc/systemd/system/kube-controller-manager.service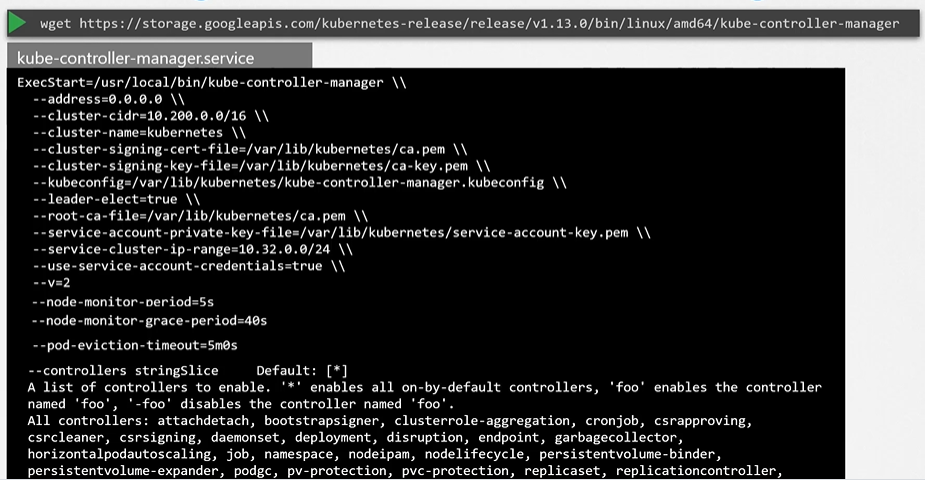
View kube controller manager
[kubeadm]
kubeadm deploys the kube-controller-manager as a pod in kube-system namespace.
$ kubectl get pods -n kube-system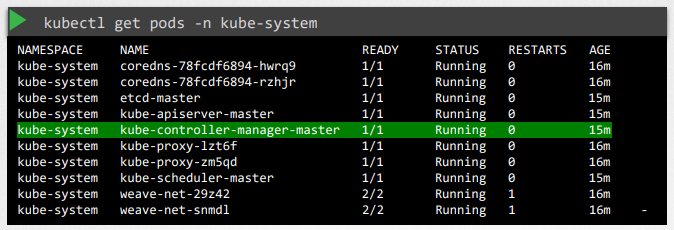
You can see the options within the pod located at /etc/Kubernetes/manifests/kube-controller-manager.yaml
$ cat /etc/Kubernetes/manifests/kube-controller-manager.yaml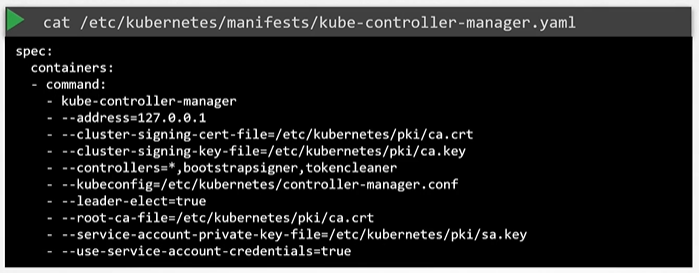
[manual]
In a non-kubeadm setup, you can inspect the options by viewing the kube-controller-manager.service
$ cat /etc/systemd/system/kube-controller-manager.service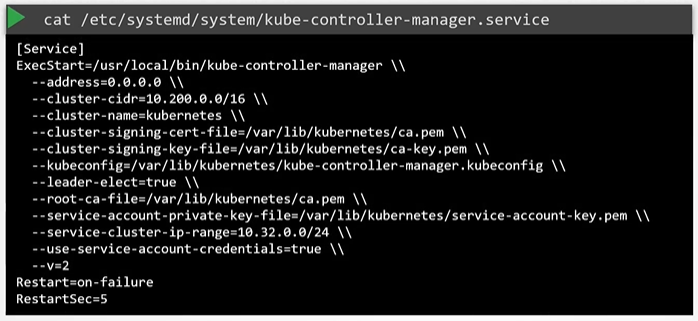
You can also see the running process and affective options by listing the process on master node and searching for kube-controller-manager.
$ ps -aux | grep kube-controller-manager