Namespaces
We’ve created Objects like PODs, Deployments, and Services in our cluster. All of this has been done within a NAMESPACE, specifically the default namespace in Kubernetes, which is automatically set up when Kubernetes is installed. However, you can create your own namespaces too.
Namespaces can be created both declaratively and imperatively.
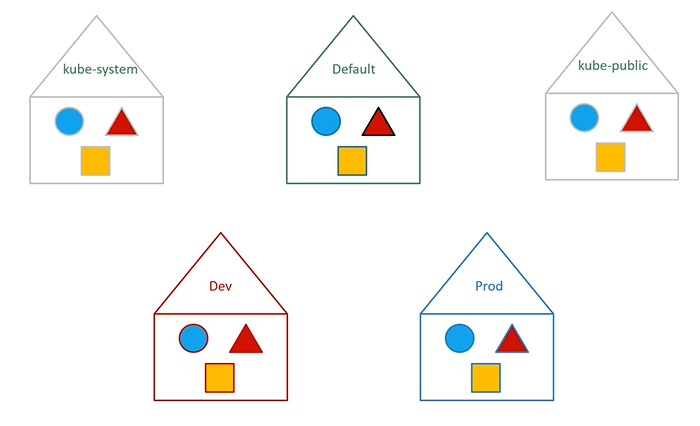
Default Namespaces in Kubernetes
- Default Namespace
- Automatically created when a cluster is set up.
- Where we’ve been working so far.
- kube-system
- Holds internal Kubernetes components like networking and DNS.
- Isolated to prevent accidental modification.
- kube-public
- Contains publicly accessible resources.
Benefits of Using Namespaces:
- Isolation: Useful for separating environments like DEV, QA, and Production.
- Similar to the Linux kernel namespace.
- Resource Limitation: Control resource allocation for different namespaces.
- Enhanced Security:
- Role-Based Access Control (RBAC)
- Resource Quotas

To list the pods in default namespace:
$ kubectl get podsTo list the pods in another namespace. Use kubectl get pods command along with the --namespace flag or argument.
$ kubectl get pods --namespace=kube-system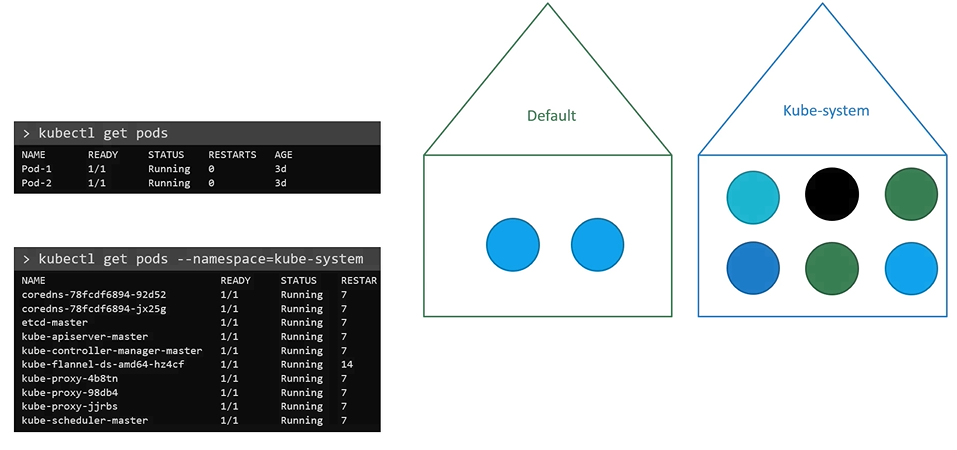
Here we have a pod definition file, when we create a pod with pod-definition file, the pod is created in the default namespace.
apiVersion: v1
kind: Pod
metadata:
  name: myapp-pod
  labels:
    app: myapp
    type: front-end
spec:
  containers:
    - name: nginx-container
      image: nginx
$ kubectl create -f pod-definition.yamlCreating pod in namespace
To create the pod with the pod-definition file in another namespace, use the --namespace option.
$ kubectl create -f pod-definition.yaml --namespace=dev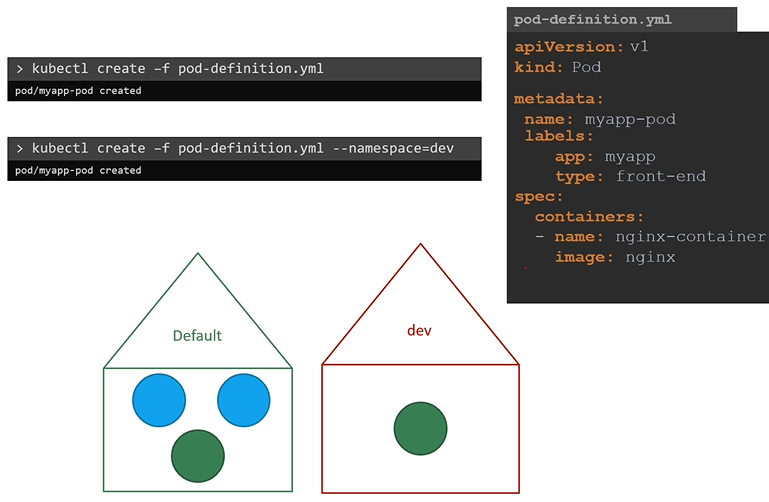
To ensure your pod is always created in the correct environment, such as dev, you can specify the namespace directly in the pod definition file. This way, even if someone forgets to include it in the command line, the pod will still be created in the correct namespace.
namespace in definition file
Moving the namespace to a file ensures that it always be created in that namespace
apiVersion: v1
kind: Pod
metadata:
  name: myapp-pod
  namespace: dev
  labels:
    app: myapp
    type: front-end
spec:
  containers:
    - name: nginx-container
      image: nginx
Create a namespace
To create a new namespace, create a namespace definition as shown below and then run kubectl create
apiVersion: v1
kind: Namespace
metadata:
  name: dev
$ kubectl create -f namespace-dev.yamlAnother way to create a namespace:
$ kubectl create namespace dev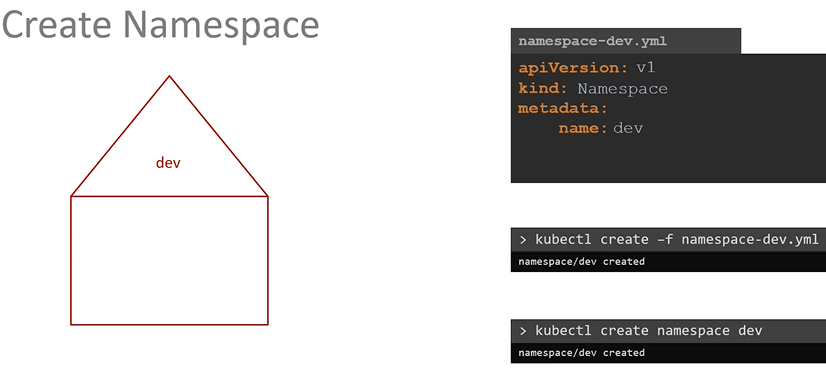
Change the default namespace context
By default, we will be in a default namespace. To switch to a particular namespace permenently run the below command.
$ kubectl config set-context $(kubectl config current-context) --namespace=devTo view pods in all namespaces:
$ kubectl get pods --all-namespaces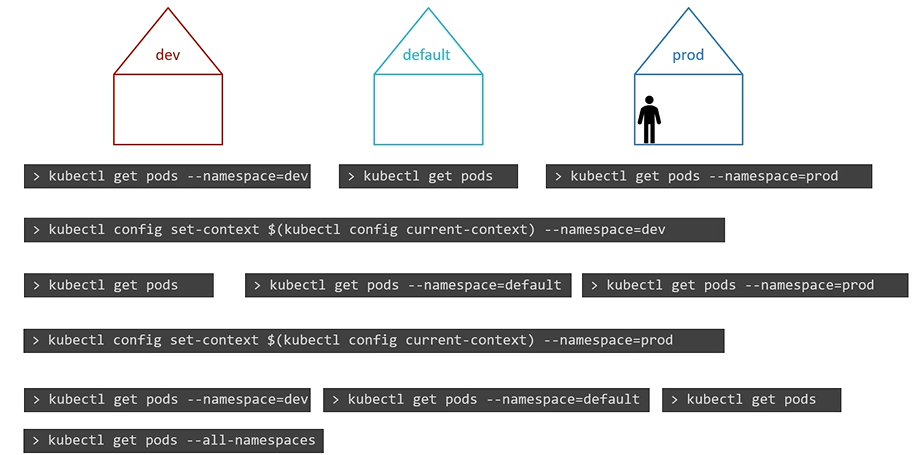
Limiting resources
To limit resources in a namespace, create a resource quota. To create one start with ResourceQuota definition file.
apiVersion: v1
kind: ResourceQuota
metadata:
  name: compute-quota
  namespace: dev
spec:
  hard:
    pods: "10"
    requests.cpu: "4"
    requests.memory: 5Gi
    limits.cpu: "10"
    limits.memory: 10Gi
$ kubectl create -f compute-quota.yaml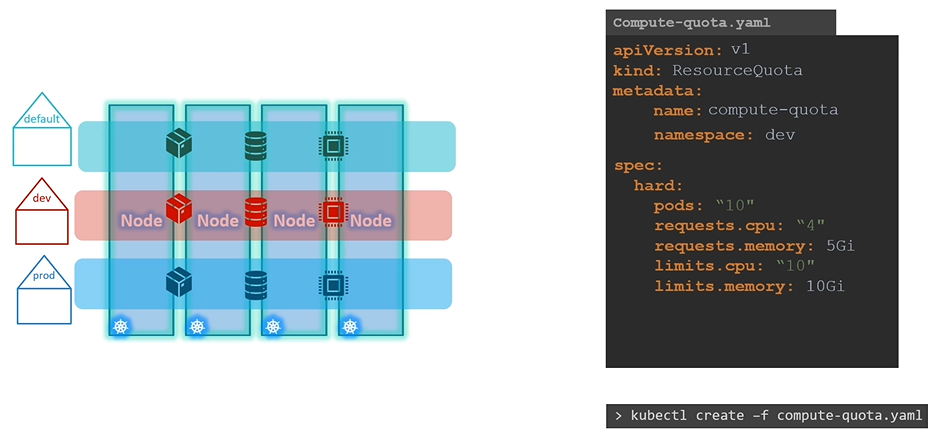
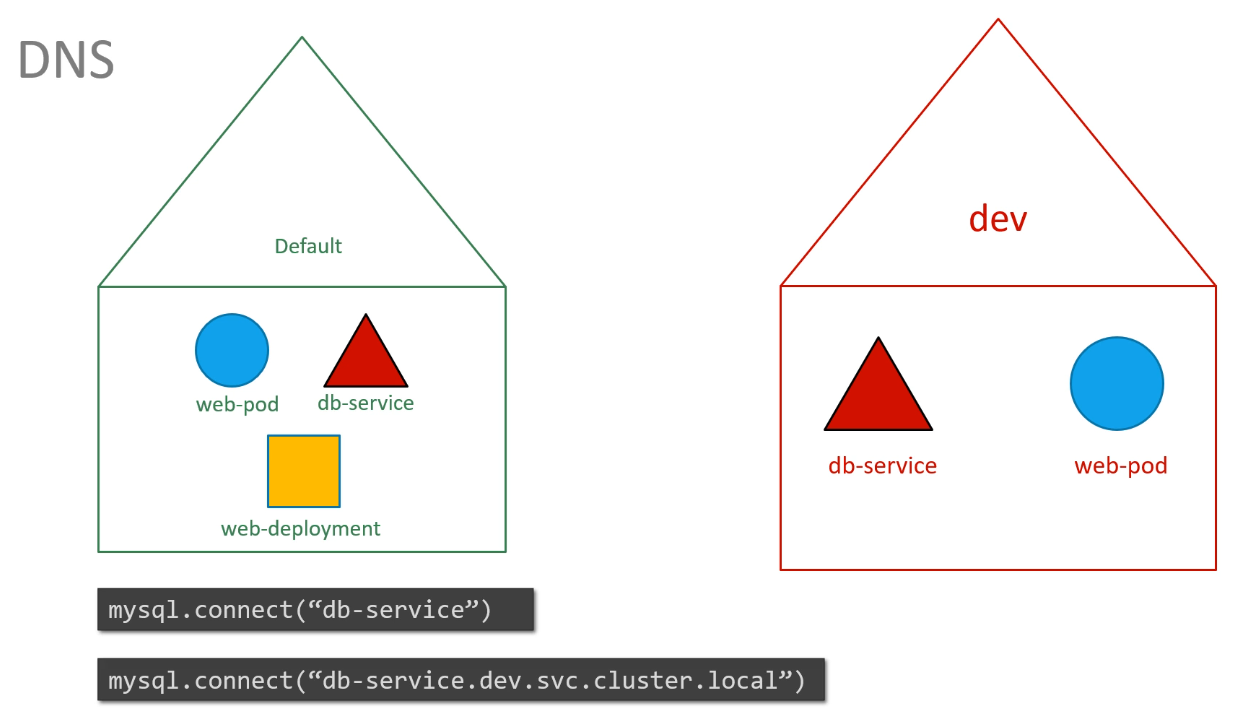
DNS
Within a namespace, resources can refer to each other by their simple names. For instance, the web app Pod can reach the DB service using just the hostname DB service.
If the web app Pod needs to connect to a service in another namespace, you must include the namespace in the service’s name. For example, to connect a web Pod in the default namespace to a database in the dev namespace, use the format service-name.namespace.svc.cluster.local. In this case, it would be dbservice.dev.svc.cluster.local.
This works because when a service is created, a DNS entry is automatically added in this format. The last part, cluster.local, is the default domain for the Kubernetes cluster, svc is the subdomain for services, followed by the namespace, and finally, the service name itself.
$ kubectl get pods --namespace=research
$ kubectl run redis --image=redis --namespace=finance
$ kubectl get pods --all-namespaces
Host Name: db-service.dev.svc.cluster.local and Host Port: 3306